Trinkey QT2040 via U2IF by Adafruit
This board uses the U2IF firmware to communicate with Blinka and is run on the attached system via USB. See the Installation Instructions for more info.
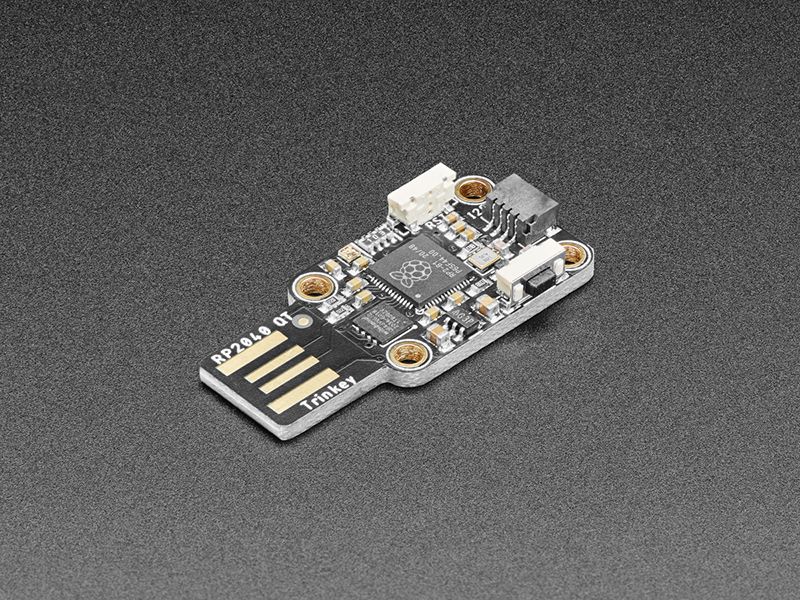
It’s half USB Key, half Adafruit QT Py, and a lotta RP2040…it’s Trinkey QT2040, the circuit board with an RP2040 heart and Stemma QT legs. Folks are loving the QT Py 2040 we made, but maybe you want something plug-and-play. So we thought, hey what if we made something like that plugs right into your computer’s USB port? And this is what we came up with!
The PCB is designed to slip into any USB A port on a computer or laptop. There’s an RP2040 microcontroller on board with just enough circuitry to keep it happy. There’s an RGB NeoPixel, a reset and bootloader or user button and a STEMMA QT Port on the end. That’s it!
With the body of the board being 1.0” x 0.7” and four mounting holes, you can attach just about any of our QT boards right on (some are a little larger so just check that has the holes in the same locations). Use M2.5 sized standoffs and screws to do so, you could use 2 diagonal at a minimum. Then use a shorty QT cable and you’ve got a custom sensor Trinkey for any sensor purpose.
The board comes with 8 MB of QSPI flash memory so you can put all of our CircuitPython drivers on the disk!
Technical details
- Main body is same size/mounting holes as most of our Stemma QT boards (1.0” x 0.7” with M2.5 holes)
- USB Type A connector with extra-thick PCB to fit into a USB host port
- RP2040 32-bit Cortex M0+ dual-core running at ~125 MHz @ 3.3 V logic and power
- 264 KB RAM
- 8 MB SPI FLASH chip for storing files and CircuitPython/MicroPython code storage. No EEPROM
- Native USB supported by every OS - can be used as USB serial console, MIDI, Keyboard/Mouse HID, even a little disk drive for storing Python scripts.
- Built-in RGB NeoPixel LED
- STEMMA QT/Qwiic port for I2C connectivity
- 3.3 V regulator with 600 mA peak output
- 12 MHz crystal
- Both Reset button and Bootloader select buttons for quick restarts (no unplugging-replugging to relaunch code)
- Bootloader button can also be safely used in ‘user’ code
Purchase
Contribute
Have some info to add for this board? Edit the source for this page here.
Adafruit Blinka Installation
We use a special library called adafruit_blinka (named after Blinka, the CircuitPython mascot) to provide the layer that translates the CircuitPython hardware API to whatever library the Linux board provides.
For example, on Raspberry Pi we use the python RPi.GPIO library. For any I2C interfacing we'll use ioctl messages to the /dev/i2c device. For SPI we'll use the spidev python library, etc. These details don't matter so much because they all happen underneath the adafruit_blinka layer.
Features: STEMMA QT/QWIIC, OSHWA Certified
Board Usage Options: Attached Device